Showing posts with label crafts. Show all posts

Tuesday, July 1, 2014

DIY decoupage bangle

Mod Podge may be one of the better inventions of man. I am mostly joking about that, but I do love its many possibilities. When I was a kid I generally used it to cover trunks and picture frames in creepy Victorian cherubs from cards. Creepy Victorian anything really! It was kind of a scary phase.

But I digress. Mod Podge is wonderful for reinvention, and a bangle is a great example. Plain wooden ones are easy to find at thrift stores and yard sales, and you can cover it in anything! I used an old fashioned (okay, slightly Victorian) paper bag, but maps, magazines and even old love notes work well.
Simply apply cut a strip wide enough to encase your bangle, or patches numerous enough to cover it, and apply Mod Podge to it and the bangle, then combine. Smooth the paper, and apply several coats (drying in between) to the outside. You can cover with varnish at this point for durability. And your done!
Hope you enjoy this project, and have a nice day!

Friday, June 27, 2014

Over my Head

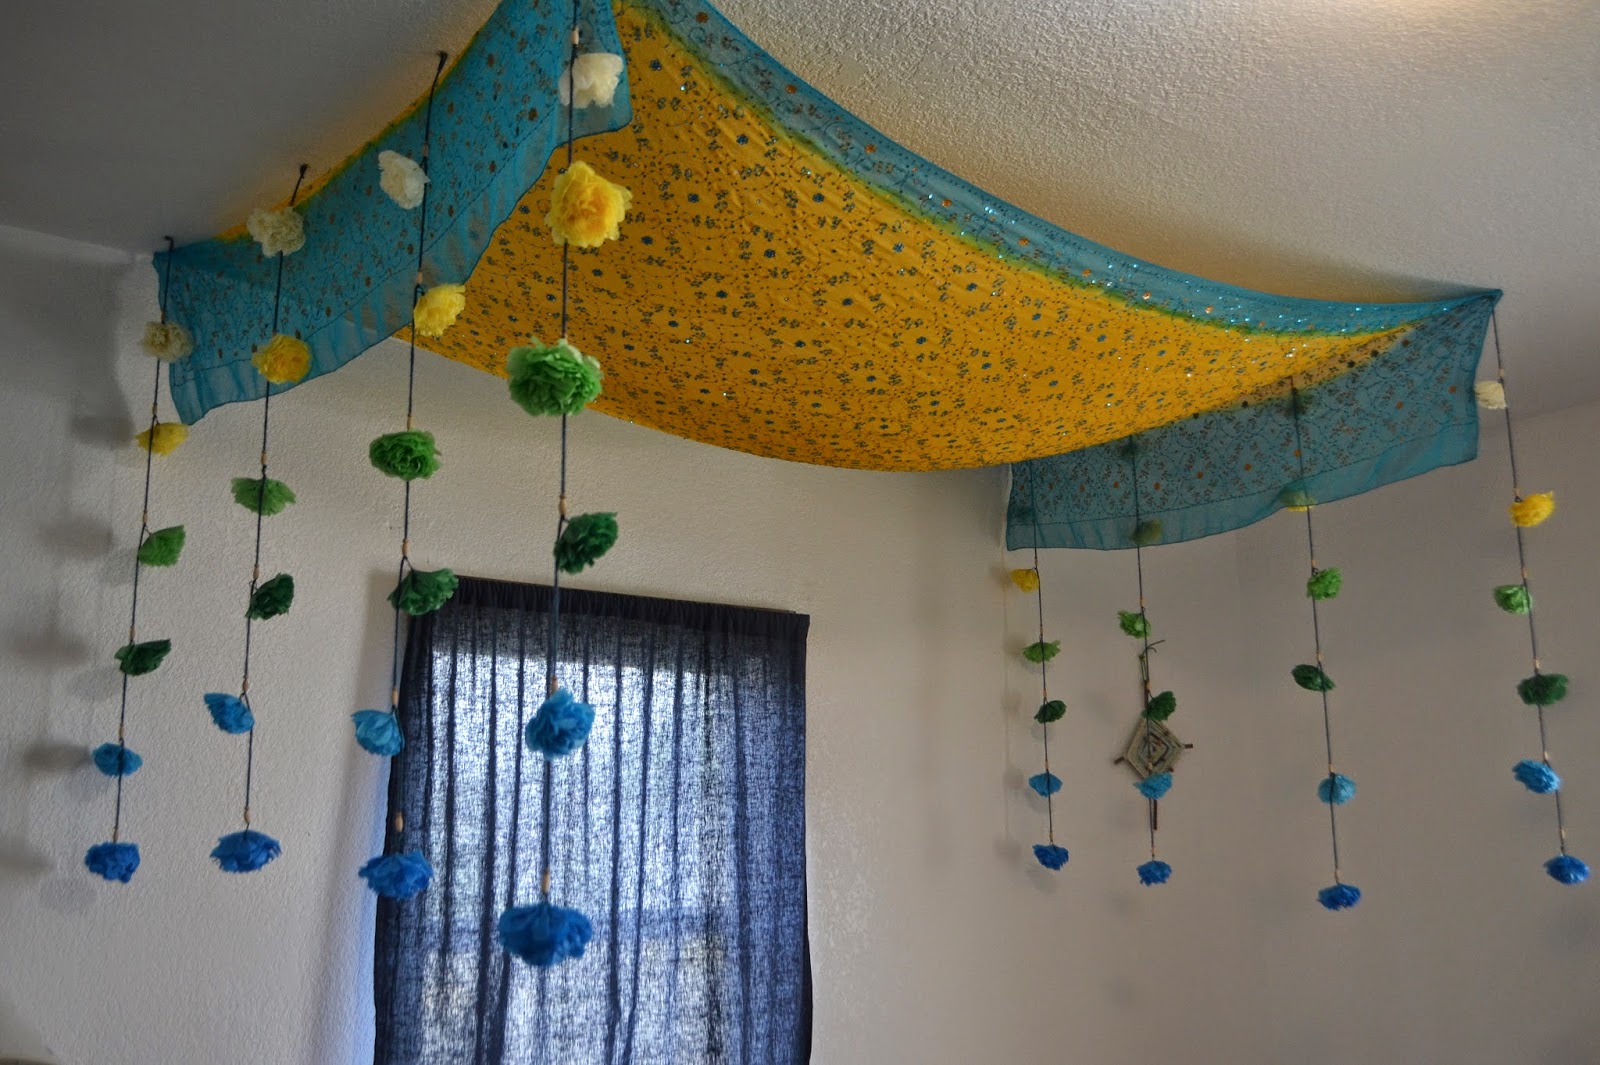
In the ongoing quest for house beautification, there has been a new addition! Chains of flowers and wooden beads, to hang from the sari canopy over the bed.
I thought about doing a tutorial, but it really is so simple! Paper Flowers, made with a loop in the back so they hang off center for a more realistic effect, spaced on yarn with wooden beads. They were hung with thumbtacks, which is great because it is a rental.
It is unfortunate that so many limitations come with renting. I would love to do a full canopy of sheer curtains, with beads throughout! In the meantime I do like how these look. They add lots of bright color, make lovely shadows and are a cheerful thing to wake up to.
This was a very inexpensive project. I had all the elements to hand, but even if you needed to buy everything the total would be less than ten dollars.
They have me thinking about what other parts of the house could use more flowers. Which is to say all of the parts of the house!

Wednesday, June 18, 2014

DIY Beachy Mirror


 Lately I've been working on decorating my bedroom. I am hoping to give it a bright but natural feel, and spend as little as possible. I decided to spruce up some picture frames and this mirror, with shells from beach adventures.
 I love how it came out! Its nice being able to see each shell in greater detail than when they were crowded in a jar.
If you would like to make your own you will need- 
sand paper
painters tape
acrylic paint
polyurethane 
epoxy or other glue
a mirror or other wooden surface
shells, agates and sea glass
(River stones and other sturdy natural objects would work too.)
First, run painters tape neatly along the inside edge of mirror to protect surface. Then sand down any rough spots, and give the whole thing a light sanding. Dust off the frame and give it a thin coat of your paint. If you are using a light color you may want to use a primer first. Letting the paint dry between layers, keep going until you are happy with the opacity.
While this is drying, you can choose to give all of your stones and shells a coat of polyurethane. You can skip this step and the stones will have softer colors, but I like the way the varnish brings them out.
Once the paint drys add a coat of polyurethane to the frame, and allow to dry. Experiment with where you would like the stones until you are happy with the results. I had enough similar pairs to match the sides over the whole mirror, but this is definitely not necessary.
Glue your decorations to the mirror and allow to dry. Add one more coat of varnish if you would like, and you are finished! Hope you enjoy this tutorial! 

Saturday, June 14, 2014

The Old and The New


I'm sorting my bead collection, so that I can make some new pieces for a farmers market! There are beads here I have had for more than a decade and forgotten about. Something about the beautiful colors, the feel of the beads and the act of bringing order to all this loveliness is very relaxing. 
There are pieces of former favorite necklaces, homemade beads, beads salvaged from terrible thrift store necklaces (some of the best). My mind is buzzing with ideas! When I am in a creative rut, sorting things this way seems to help dislodge me. New combinations suggest themselves, and even new beads to create.
I've also been whipping up a few of these daisy chain necklaces for entertainment. I'd love to make a handful that coordinate, to wear at once for a big impact or separately to be more subtle. 
These vintage beauties were my Great Grandmothers, and I've been meaning to re string them for years. A few pearls seem like they would make a nice addition. A few old projects I may have to revisit were even mixed into the chaos!
Hope you have a marvelous day!

P.S. What do you like to do when you are stuck creatively? 

Thursday, June 5, 2014

DIY fabric Yo Yo's!


Yo yos are sweet little pinwheels of fabric, wonderful for decorating all kinds of things! Its a great way to use up scrap fabric, and to spruce up clothes in need of an update. People even make quilts from them!
The instructions are very simple. First use a glass, bowl or other round object to make circles on your fabric. Small patterns, stripes or polka dots show up well when finished. Then cut out your circles, making sure to remove all markings, unless you are using a washable fabric pen.
Next thread a needle with three strands of a hank of embroidery floss, and leave the end unknotted. Tuck about an eighth of an inch of fabric in around the outside of the circle and make small stitches as you go. When you reach your starting point, draw the circle together using the strings. It will look like a tiny pouch. Tie the strings together tightly, cut off and tuck excess inside the pouch. Flatten from the top, and you have a yo yo! They can then be sewn unto your skirt or other item of your choice. When applying them I recommend stitching up through the bottom and catching some of the drawn in portion so the yo yo remains flat.
Hope you enjoy this project! Tomorrow I with show an outfit featuring my yo yo-ed dress.

Tuesday, October 15, 2013

Fall DIYs

Its getting cold out! And other than long walks though leafy lanes, all I want to do is create. To that effect, here are some wonderful projects for when you'd like to celebrate nature in a more abstract (i.e. warm) capacity. Don't people come up with fantastic things? 


                                                           Adorable Pumpkin Garland